
An Art Teacher’s Practical Guide to Using Clay and the Kiln
Are you unsure of how to instruct your students to work with clay, or worried about using your school’s kiln? These 21 tips will help! From what type of clay and glazes to try, to kiln safety tips and everything in between, this post provides some useful advice to help you get started working with and firing clay.
Before I began teaching art, my soon-to-be principal led me on a tour of the school and art room during my job interview. “Look, we have a kiln that you can use for clay projects with the kids!” she said proudly. “Oh, wonderful!” I replied. But on the inside I was terrified. I had made one clay project during my freshman year of college, and that was it.
But I vowed that I would learn to use that kiln! Despite one eventful and embarrassing night that first year when the fire department had to come shut the kiln off (true story), I have learned a whole lot about clay and the kiln firing process. I even started making and selling personalized clay tiles on Etsy and ended up purchasing three small kilns for my home!
If you are a newbie at teaching art, like I was, and want to incorporate clay into your program, or if you just want to learn the basics for yourself, these 21 tips will help you get started!
Working with clay
1. First, know the stages of clay.
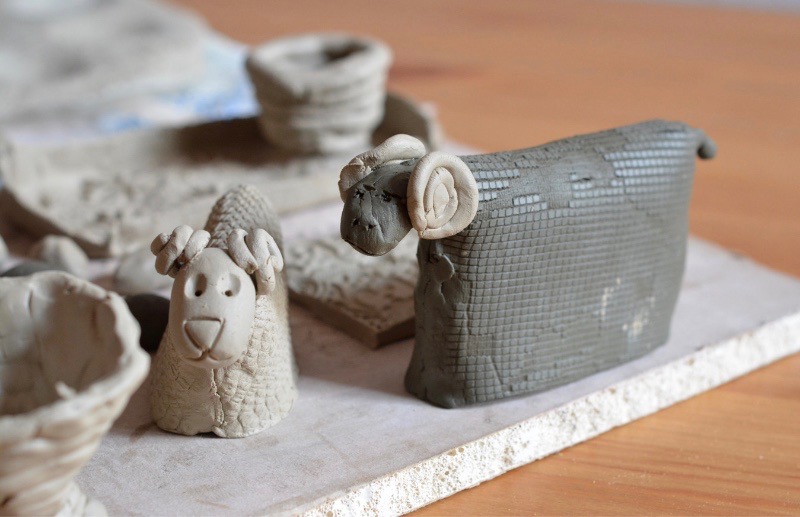
- Plastic: When clay is still wet and malleable, the stage in which students will sculpt their creations, the clay is “plastic.” Students may create a pinch pot, coil pot, or any sort of hand built (or wheel thrown, if you have a pottery wheel) item from clay.
- Leather hard: Once the clay dries out a bit, but is still bendable (similar to the texture of leather), the clay is still considered plastic but is now “leather hard.” This is the stage at which students can create slab constructions with more rigid walls.
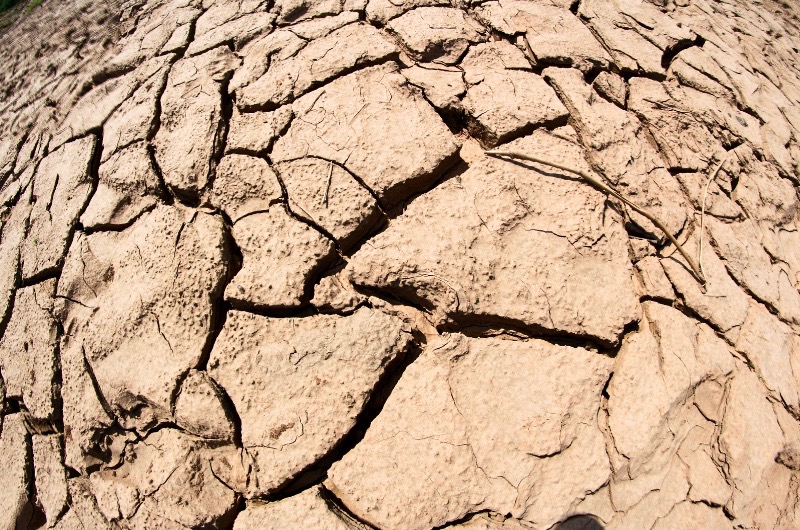
- Bone dry: When the clay has been allowed to dry out completely (but before a kiln firing), it is considered “bone dry.” Clay can take a week or even two weeks to dry out completely, depending on the thickness of the clay. (If you were to add water back to the clay at this stage, it would eventually become plastic again.)
- Greenware: Technically, any stage before bisque firing is considered “greenware”, but most people use that term only to refer to the bone dry pieces before they are put into the kiln. At this stage, they are extremely fragile.
- Bisqueware: After the first firing in the kiln, all moisture is truly gone from the clay. The clay is now hard and its molecular structure has changed. Now the piece is porous, but adding water will never make it “plastic” or pliable again.
- Glazeware: This refers to clay that has been through a second firing after glaze was applied to the bisque. In the kiln, the glaze melts and fuses to the pot.
2. Order the right clay for your project.
I teach pre-K through sixth grade, and I (as well as many elementary art teachers) use only low-fire earthenware clay. Sometimes we use red clay, and sometimes we use white, depending on the project. This clay typically fires to cone 04 (more about “cones” later). I sometimes pick up the clay myself from a local store so that I don’t have to pay shipping costs. However, I have found that sometimes it’s worth paying shipping to get the clay delivered (it’s way easier than lugging a bunch of 50 lb. boxes of clay to the car and then into the art room!).
You will want to get a wire with a handle at each end for cutting the clay—this is so much easier on the wrists than trying to pull and tear off pieces for each student by hand!
3. Use squares of muslin or canvas cloth as mats for students to work on.
I use a rotary cloth cutter to cut a big sheet of unbleached muslin or canvas into a class set of small squares (probably 9”x9” or so) so that each student has their own mat to work on. This helps keep their clay from sticking to the table. If you plan to use white and red clay, you’ll need a separate set of cloths for each color of clay.
4. Have students “wedge” the clay to remove any air bubbles that may occasionally be trapped in the clay.
Before beginning any clay project, I have my students basically pound or throw the clay down several times onto their cloth to eliminate any air trapped in the clay.
This doesn’t seem to matter as much if you are using clay straight out of the bag, but it is important if you have been putting your extra unused pieces back together and then hand the students a pile of different chunks of clay. It also matters if they have flattened out the clay and then try to “fold” it back into a ball, which can trap air in the middle. Unless we are doing something requiring a flattened slab, I remind the students to wedge by throwing the clay down onto a different side each time, so that it stays in a chunk instead of flattening out like a pancake.
5. Store in gallon-size Ziploc baggies between classes.
For my older students (fourth grade and up), our clay projects take more than one class period. So, I have students write their names on gallon-size Ziploc-style bags with Sharpie. At the end of each class, I have students wrap their clay in a damp paper towel (damp, not soaking—it’s actually easier if I put the paper towels out on their tables for them while they work rather than letting them wet the paper towels!). Then they seal it in their bag and I have them place their sealed bags on cookie sheets (which makes it easier for me to move them all at once onto a shelf), and they stay moist until the next week.
As students finish, I have them place finished items on the cookie sheet. (I save the empty bags to use for other classes). Older students can carve their name on the bottom of the piece with a toothpick, but for younger grades I place parchment paper with their names (or classroom numbers) in Sharpie, and each student places their piece on their name. Then I come back after class or whenever I have a break and carve their names for them. Otherwise, I have learned from experience, no one can read it!
6. Use toothpicks and plastic knives as clay tools.
With my elementary students, I don’t even use “real” clay tools—they can make just about anything and everything by using toothpicks and plastic knives! (Occasionally we’ll also use some plastic forks, glue stick lids or marker lids, and paintbrush handles.) The point is, everyday objects make great clay tools.
7. Teach the importance of scoring and slipping!
Also called “scratch and attach” (or other variations), these two actions are so important if you are attaching two pieces of clay together. As early as first grade, I teach students to “score” (scratch rough lines on both pieces of the clay where they touch) and add “slip” (gooey clay with water or vinegar added) to anything they want to attach together. I make the analogy that it’s like two pieces of velcro with glue in between.
Without fail, there will always be some who ignore this part and just try to stick two bits of clay together. Those attachments will almost always fall off, but we can sometimes get them to fuse back together during the glaze firing. (Or if not, hot glue can usually do the trick!)
8. Before bisque firing, let the clay dry…and dry some more.
Remember, it can take a week or more for the clay to become completely bone dry, depending on the thickness of the piece.
*Pro tip: If the clay still feels cold, it is not yet bone dry and still contains too much moisture to fire. Firing before bone dry is likely to cause pieces to shatter. Think about it: water boils at 212 degrees F (100 degrees C), so if moisture remains in the clay during a bisque firing, once the kiln hits that boiling point the moisture basically boils and becomes steam. The steam rapidly expands and bursts through the clay walls, shattering your piece.
Using the kiln
9. Use the “preheat” option on the kiln.
Sometimes (always!) we art teachers may be on a tight schedule. I have found that I can put mostly dry pieces in the kiln and preheat at 150 to 180 degrees F for several hours until all moisture evaporates.
10. Find and read the user manual for your particular kiln.
You can usually find these online these days. You’ll want to know exactly how to program your brand and model of kiln for glaze firing and bisque firing, as well as if your kiln has options for preheating, holding at a certain temperature, and delaying the firing so that the kiln can turn on at a certain time. You will also want to read about your kiln’s error codes. Some kilns are automatic and only require you to push a few buttons to begin a pre-programmed firing schedule, while others are manual and require you to turn the dial up or down after a certain amount of time.
11. Before you begin—prepare your kiln.
You will want to vacuum out the kiln (especially the element grooves) before your first firing and, as recommended by David Gamble, every 20 firings or so and also after any piece shatters in the kiln.
Place shelves at the bottom of the kiln (on short stilts) so that pieces do not sit directly on the bottom of the kiln itself. Also, apply kiln wash to the shelves, which helps protect the shelves from glaze drips (and can make it easier to remove pieces should the glaze melt the piece to the shelf).
12. Use pyrometric cones…
Pyrometric cones can help you make sure the kiln is firing correctly. Designed to bend at certain time and temperature combinations, pyrometric cones can help you to know if an automatic kiln controller is giving an accurate reading.
Here is a cool video showing pyrometric cones at work:
The traditional way to use these cones is to place three cones in the kiln—if you are firing at cone 04, you would place an 03, 04, and 05 cone in the kiln. If the kiln is firing correctly, the 03 cone will stay straight, the 04 cone will bend around 90 degrees, and the 05 cone will droop over. I don’t think it’s necessary to use three cones for every firing, but using a single cone (the number of your desired cone firing) can help you to make sure everything is working correctly. If you suspect that something is wrong, or you’re just using the kiln for the first time or so, use the three cones to help gauge accuracy.
(My first year of teaching, I noticed that my glazed pieces came out much darker than expected, and the clay itself looked misshapen and “melted”. When I used pyrometric cones, they did not bend to their intended angles during my cone 04 firing—they all basically bent all the way over and looked like dark puddles! Even though the kiln was telling me it was firing at cone 04, it was much, much hotter, and I had to have someone come in and repair my kiln.)
13. …And understand cone ratings.
So, this is where it gets a little technical. To bisque fire or glaze fire correctly requires the right amount of “heat work”—it doesn’t just matter what temperature the kiln reaches; it also matters how long the kiln stays at each temperature and how quickly the temperature rises.
Each cone number corresponds to a different heating rate and temperature combination. You can find a full cone chart and explanation here or here. The cones measure overall heat absorption. So, if the temperature ramps up faster at cone 04, for example, the kiln will need to reach a higher temperature (1971 degrees F) than if the temperature ramps up more slowly (1945 degrees F) in order to create the same amount of heat absorption.
Cone numbers range from 10 (the hottest firing), down to 1, and then down to 01, all the way down to 022 (the coolest firing). Think of the zero as a “minus,” so 04 is like a “minus 4” on the chart and is very different from cone 4!
14. Firing schedules: “Ramp speed” and length of kiln firings
Bisque fire sloooowly.
If the temperature rises too fast during a bisque firing, not only can the clay pieces shatter if any moisture remains, but other problems can arise. Organic materials need to burn off completely during the bisque firing, or they may later burn off and escape as gas during the glaze firing (which can create a pinhole effect in the glaze).
Automatic kilns have a thermocouple that will shut off the kiln when the correct heat absorption has been met. On my large Skutt kiln in the art room, I can hit the “slow bisque” (or “fast bisque”) program button, “cone 04”, and “start”, and the kiln will run through the program automatically, ramping up at the correct speeds and reaching the correct temperatures throughout the firing and then shutting off once it reaches the final temperature. (This is so nice and simple!)
But I have also had manual kilns at home, and I had to pay much more attention to the manual kiln during firings. Here is a good explanation of firing schedules. A typical bisque firing schedule, for example, is to preheat as needed at 150 degrees F (also called “candling”), then three to four hours with the ramp at 200 F per hour (depending on your kiln, this might be on the “low” setting), then three to four hours with the ramp at 300 F/hour (“medium”), then ramp at 400 F/hour (“high”) until temperature is reached.
(Some kilns need the lid propped slightly open for the first few hours, while others don’t. The top peephole is often left unplugged during firing. Read your kiln manual to find out these details for your kiln.)
Once the kiln reaches peak temperature it should be shut off and allowed to cool down while closed. The cool down will usually take about as long as the main firing. Be sure not to open the kiln until it is back under 200 degrees F or so to prevent thermal shock.
Glaze firings
Glaze firings are usually faster than bisque firings and also need to reach a lower cone number than during the bisque firing. If I bisque fire at cone 04, I will glaze fire at cone 05 or 06. Again, do not open the kiln until under 200 degrees F (the closer to room temperature the better)—I have made the mistake before of opening when too hot and could hear the “ping, ping” sound of tiny bubbles bursting, which gave the glaze a pitted effect.
15. Keep a record of kiln firings.
You can record the cone to which you bisque fired or glaze fired, the length of the firing, the temperature reached, and results. This can help you note what works best and also if something is going wrong (for instance, kiln is firing too hot, too quickly, etc.). It also helps you remember how many times you have fired so that you’ll more easily recognize when it may be time for maintenance. The Art of Ed has a useful kiln firing log you can download.
16. To glaze or not to glaze?
As far as glazes go, some people prefer to use underglazes (which you can then dip or coat with a clear transparent glaze for a glossy look). I prefer to use colored glazes—the students just paint their bisque pieces with three coats of glaze, letting each layer dry for a few minutes in between, and that’s it.
Teachers’ Palette glazes by Amaco are awesome because you can mix them together and what you see is fairly close to what you get after the glaze firing (and they come in class packs). I also love the Mayco “Jungle Gems” crystal glazes for certain projects—these glazes have small pieces of glass frit mixed in, so they create a beautiful mottled or speckled look. (I usually have my pre-K and kindergarten students paint with one color of jungle gems glaze on their whole piece—this prevents the messy look of a bunch of glaze colors randomly mixed together).
If you don’t want to use glazes, there are other ways to finish the bisque pieces. Students can paint with watercolor or acrylic, or color with oil pastels. Then they can paint on a coat of sealant, like mod podge or triple thick gloss glaze, or the teacher can spray on a sealant like polyurethane. (Obviously you should not put back in the kiln a second time if you are not applying glaze!)
17. The one step sculpt-and-glaze hack
Again, because of time restraints, sometimes art teachers want to eliminate as many steps as possible. It’s true that students can apply glaze to greenware and then bisque fire with the glaze already applied. However, bone dry greenware is extremely fragile, and this is a prime opportunity for students to accidentally break off appendages or handles while applying glaze.
If you do this, warn students to handle their piece with care, or even don’t handle it at all—if they can paint it while it sits on the table, even better! Because this will need to be bisque fired (which is a longer and hotter firing than a glaze firing), the glaze colors may come out a bit different than if you were glaze firing separately. You could try bisque firing to cone 05 rather than 04 in this case—experiment and see what works for you!
18. Pour glazes into egg cartons, ice cube trays, or condiment cups with lids.
My favorite way to distribute glaze is to pour colors into clear plastic egg cartons (which I ask parents to donate—I ask them to wash them out first). This way, each table gets up to twelve colors of glaze, and when they are done, I can close the lid on the egg cartons and store several at a time in one of the big two-gallon Ziploc bags, which keeps the colors from drying out. I can then pull them back out for the next class who’ll be glazing and just add to the colors when they run low. When we’re finally done, I just throw away the egg carton for easy clean up.
Other art teachers may prefer to pour glaze into ice cube trays or condiment cups with lids (which can be stored in those plastic muffin trays with lids from the dollar store). Whichever way you do it, you just want to find a way to save and reuse the glazes from class to class, which will save a ton of time and keep from wasting expensive glazes.
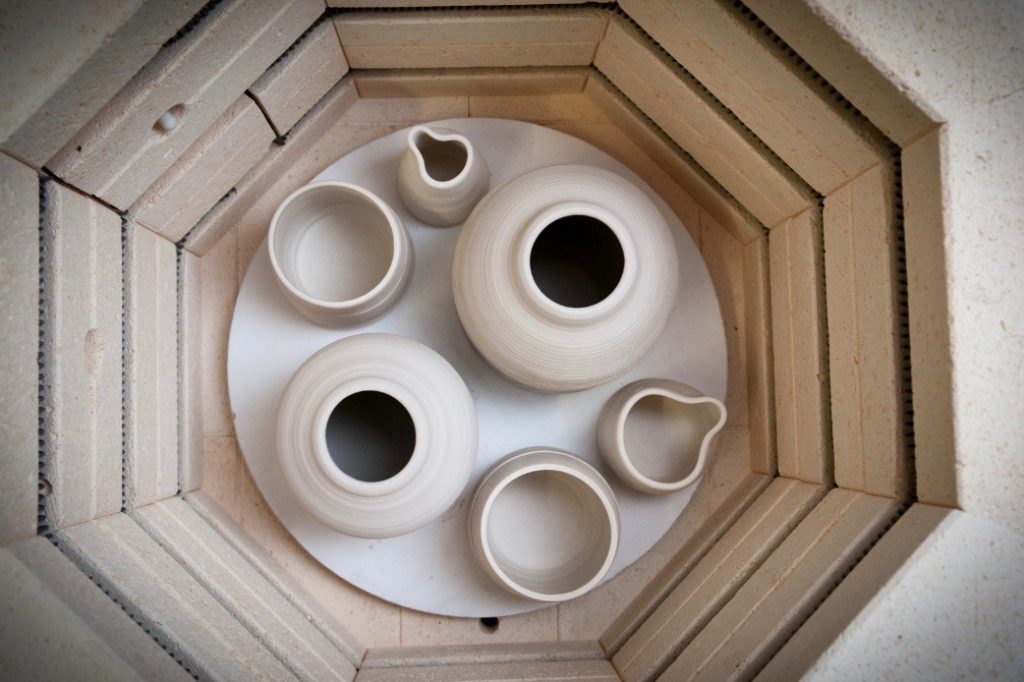
19. How to load the kiln
Kiln furniture
You will need to have kiln posts of varying heights (though you could start with a few sets of 6 inch posts, as most small student projects will generally fit under shelves placed at 6 inches high) as well as kiln stilts and shelves (again, make sure to coat with kiln wash before firing and every year or so when it starts to wear off). Make sure to place kiln shelves on short posts at the bottom of the kiln rather than placing anything on the actual kiln floor.
To add additional shelves, if you have a large round kiln with the half-circle shelves, place three posts on each kiln shelf, one at the outside middle and one at each corner. (This triangular placement of three posts will actually be more stable than if you try to use four posts.) Then do this for the shelf on the other side. Place the next shelf on top of the posts, make sure it’s stable, and if you need another layer, place your next three posts directly above the posts in the previous layer.
Loading for a bisque firing
When bisque firing, you can stack greenware close together or even touching, but you’ll get better heat distribution if they are spaced a bit apart. You should always have one inch clearance between the clay pieces and the walls of the kiln, and about five inches left at the top below the kiln lid.
Taller pieces should be placed toward the middle of the kiln to help with heat distribution, with shorter pieces around the outside edges. Also, kiln shelves should be staggered at different heights to allow the heat to flow throughout. Make sure nothing is blocking or touching the metal thermocouple.
Loading for a glaze firing
When glaze firing, you have to make sure there is ample space between each piece so that they don’t touch and fuse together as the glaze melts. I always make sure that students don’t glaze the bottom of their piece—if they accidentally get glaze on the bottom, they should use a wet paper towel or wipe to wipe the glaze off so the foot of the piece is completely glaze free. (If you prefer to dip in overglaze or have the bottom of the pieces glazed, you’ll need to use stilts to keep the glaze from touching the kiln shelf.) If using a particularly thick or runny glaze (like the Jungle Gems glazes, which tend to move more than regular glazes), you may also want to use stilts or have students stop glazing about 1/4 inch above the very bottom.
20. Safety first!
The kiln should be in a well-ventilated area, and the wiring needs to be the correct size and rating for your kiln (again, check the manual for your particular kiln model). The kiln should be 18 inches away from any walls. Obviously, keep all flammable materials far away from the kiln during firing! Also, from time to time you should inspect the plug, prongs, and cord to see if anything is loose or discolored, which could be a fire hazard.
Looking into a hot kiln for an extended period of time can potentially cause eye damage, so use dark UV glasses if you look inside the kiln during firing (or welders glasses if looking for extended periods). Remember that the heat is intense around the peepholes; use fire rated gloves if removing a peephole plug or closing the lid. Also, unplug the kiln anytime you are loading or unloading the kiln, to avoid the risk of electric shock.
Keep kids away.
If you are an art teacher, you need to think about how to keep students away from the kiln during a firing. Many kilns are in separate rooms or closets. Mine happens to be in a separate closet, but the doorway to it is right by the door to my classroom, so students walk by the kiln room as they enter art class. I have to leave the door to the kiln room open during firing. (Remember when I told you the fire department came my first year? I’d left the door mostly closed to be more “safe” but the room got way too hot and set off some sort of heat sensors in the middle of the night, and the fire department came and shut the kiln off during firing!).
So, I currently have a gate across the door with a big sign on it that says “DO NOT ENTER KILN ROOM” if I’m firing during the school day. I also talk about safety many times with my students, especially at the beginning of each school year, and really try to teach them the importance of that gate. I am hoping to get a lockable screen door or half-door (like a Dutch door) installed soon.
Time it right.
Another option is to fire when students are not at school, BUT it is recommended that you be near the kiln when it’s firing, especially during the end when it should cut off. If your kiln has the option, you can set it to “delay start” and have it start at, say, 9:00 PM so that it will be turning off around 7:00 AM (or whatever the particular length of your firing program).
(If you have a kiln with a kiln-sitter, you may also be able to get a device called a limit timer, used in conjunction with a kiln-sitter, which can be set to turn off the kiln after a set amount of time. For example, if you expected the firing to be done after ten hours, you could set it to cut the kiln off after eleven or twelve hours to absolutely make sure it can’t keep heating if something were to go wrong with the kiln).
21. Find the number of your local kiln repair person, just in case.
At some point, your kiln will need maintenance, or you may have a major issue (like I did when my kiln fired much hotter than expected). You may be able to look online to find someone who can fix kilns in your area, or check with other schools in your area that have kilns. Other places to ask around might be local pottery studios, a “paint your pot” shop, or even nearby colleges or universities with a sculpture program.
I hope these tips for using the kiln and working with clay will prove useful! Experience is the best teacher, so experiment and figure out your own tips, tricks, and shortcuts for creating clay projects with students. If you’re wondering where to start, try ordering white clay or red clay and go from there!
Art teachers, what are some things you do differently when you work with clay? What are your tried and true kiln tips? Please comment below!